Integration Setup
Now all of the integration software should be installed and functional on your computer along with installation of the Moolah PowerShell module.
Create PasswordSafe accounts
Start the PasswordSafe application and setup accounts similiar to the ones image below.
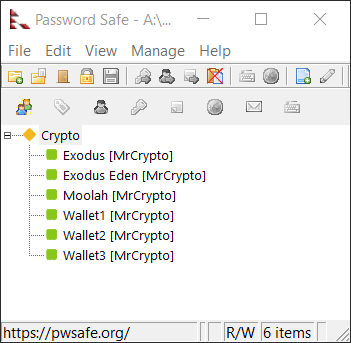
Looking at the above image, you can see strong passwords (20+) characters have been setup for the wallet applications (Exodus & Eden), and for the VeraCrypt containers (Moolah, & Wallet1 - 3).
You are at complete liberty to use any naming convention that you desire. Hopefully you have choosen a strong password that you can remember for the PasswordSafe application or have it on a hard copy somewhere. Losing or forgetting your PasswordSafe's password is effectively the same as losing all of your data.
At a minimum you will to create 3 accounts, one for the Moolah and wallet VeraCrypt containers and one for the wallet application. Create strong passwords (20+ characters) for each of those accounts.
Go to the install location of PasswordSafe and note the full name of the file ending with an extension of .psafe3. For the sake of this setup example, I'm going to assume the name of the file is Moolah.psafe3.
Create VeraCrypt containers
The Moolah VeraCrypt container will contain at a minimum the Moolah database file, MoolahDB.xml and the PasswordSafe database file, Moolah.psafe3 (your file name can be anything you want it to be).
On the C: drive a folder needs to be created that servers as the Online container location. For this setup example, I'm going to assume that C:\bin\Moolah is the folder location for the Online VeraCrypt container location.
Go ahead an create the desired Online folder on the C: drive.
The same folder location needs to be created on your Offline media (USB or MircoSD). For this setup example, I'm going to a assume that D:\bin\Moolah is the folder location for Offline VeraCrypt container location.
Go ahead an create the desired Offline folder on the D: drive.
Copy any small file on your computer to the Online folder location and rename it to Moolah. Then make a second copy of this file and name it Wallet or a name of your choosing. These two files will be overwritten by VeraCrypt during the container creation step.
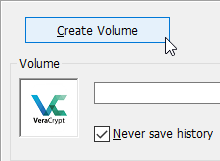
Launch the VeraCrypt application and click on the Create Volume button to create the Moolah VeraCrypt container.
Accept all of the default choices on the Wizard dialogs and click Next
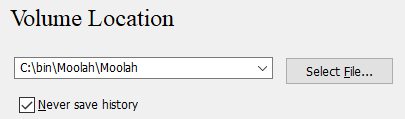
At the Volume Location dialog click on the Select File and select Moolah file in the C:\bin\Moolan folder. After clicking Next, you will get a warning dialong asking if it is ok to over write the file select, Yes.
At the Volume Size dialog, enter a size of 10MB and click next.
At the Volume Password dialog, open PasswordSafe and copy the Moolan account password.
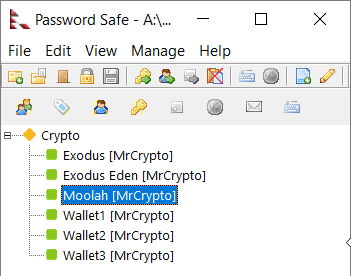
Right-click and select Copy Password to Clipboard
At the Volume Password dialog, type CTRL-C in each password field and click Next
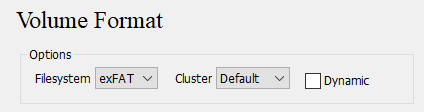
At the Volume Format dialog following the instruction for moving the mouse to randomize the encryption process, then select exFat as the FileSystem and then click Format.
You'll get a warning indicating the file will be overwritten, select Yes.
Awesome, now the Moolan container has been created.
Click Next to create the Wallet container. The proccess for creating the Wallet container will be the same as for the Moolan container except you'll want to select a size of 200MB for this container. And I hope obviously you know you'll have to select a different seed file for the creation of the container.
Now at this point, there should be 2 empty VeraCrypt containers in the Online folder, C:\bin\Moolah or the folder naming or your choice.
Once the containers have valid data in them, you'll want to be extremely careful to NEVER use them as seed files for creating new containers. It should be very apparent that VeraCrypt will overwrite any file that you give it during the create volume process.
The Online folder should now have two VeraCrypt containers.

Next, the empty VeraCrypt containers need to be mounted so valid data can be copied to them.
Using VeraCrypt mount the Moolah container as drive A and the Wallet container as drive B.
Typically, the A and B drive letters are rarely used but if they are already in use select a different pair of drive letter that can be used consistently.
Copy your PasswordSafe database, Moolan.psafe3 to drive A.
If you have crypto currency in your Exodus wallet, I recommend you copy the directory to a backup folder and create an empty wallet. Because you don't want to be in a situation where you've accidently move coinage to the wrong folder location. If you start Exodus the default way and see an empty wallet, it should be apparent you didn't launch Exodus using the Moolah module.
Copy the contents of your Exodus wallet data folder to drive B. Obviously, Exodus should not be running at this point in time.
Dismount both the A and B drives using VeraCrypt. Note that VeraCrypt has an icon in the system tray so you can interface with it that way too.
Moolah Initialization
Next we need to initialize the Moolah module, so it knows where to find the Online and OffLine folder paths you've choosen and the desired drive letters and etc...
So make notes of this information because it will be needed in the last step of initializing Moolah.